YAY for Valentine’s Day and slice and bake Valentine’s Day Cookies!
It doesn’t matter what some people say about Valentine’s Day, that it’s become such a commercial holiday (even if it has), because it still is a nice day to spend time with that or those special someones.

Your special someone can be your boyfriend/girlfriend or husband/wife… but it can also be your BFF, your parents, your grandma, your neighbors!
In Spanish, we call this “Día del Amor y la Amistad,” (Friendship and Love Day). In other words, this festivity includes another form of non-romantic love, and II really like the fact that the name itself includes another form of non-romantic love. Of course, no one can deny Valentine’s Day is the biggest display of chocolate-overboard & romantic gestures…but that doesn’t mean it has to stop there!
Anyways… where was I?
Oh yes: Slice and bake Valentine’s Day cookies!
These cookies are:
- Super colorful
- Easy to make
- Perfect for kids
- Great edible gifts
- A lovely Valentine’s Day gift idea
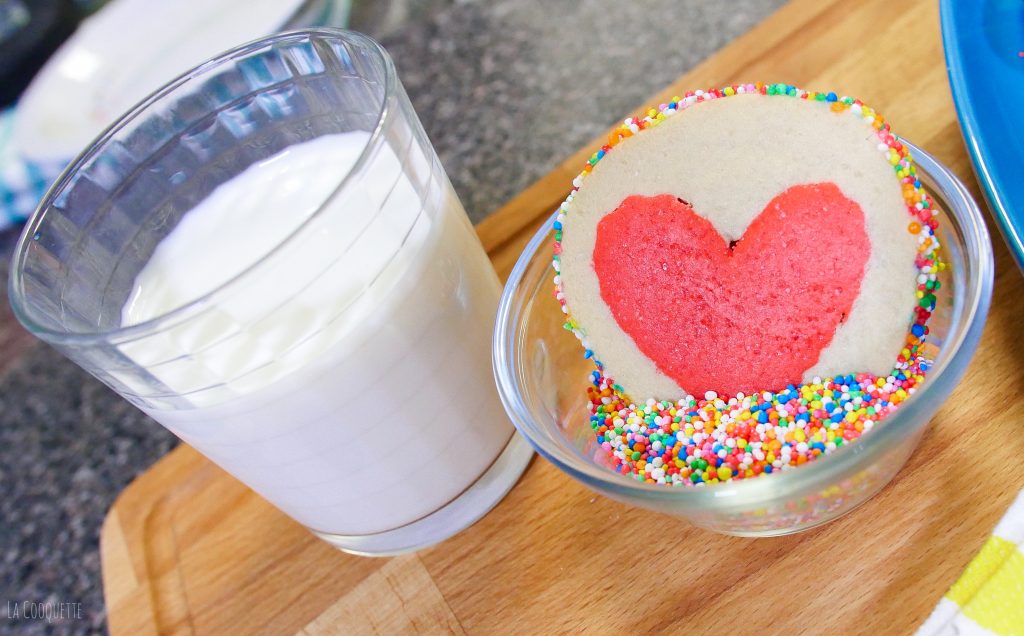
And even though they have a heart inside them, these cookies are meant to be shared with anyone – especially your friends- if not EVERYONE!
Spread a bit of joy in sprinkle form!
Slice and bake cookies are a great DIY project to undertake if you’re celebrating the holiday by staying in. In my case, I baked with the help of my foodie friend Karen Rios and we had a blast! ❤️
What You Need To Make Slice And Bake Valentine’s Day Cookies
Find the full recipe, with ingredients and a step-by-step guide below.
Hope you have some sweet Valentine’s Day plans!

Slice and Bake Valentine’s Day Cookies
Ingredients
- 3 cups all-purpose flour
- 2 tsps baking powder
- ¾ cup granulated sugar
- 2 sticks unsalted butter, softened
- 1 large egg
- 1 tsp vanilla extract
- Pink and red gel food coloring
- ⅓ cup Rainbow sprinkles (about 1/3 cup)
Instructions
- Mix soft butter at room temperature with sugar until getting a cloud-like, fluffy mixture in a bowl. Then, keep mixing and add egg and vanilla extract.
- Sift the dry ingredients together in a separate bowl: baking powder and flour.
- Put the dry ingredients and the soft mixture in a bowl, and mix to get your cookie dough. Then, cut the dough in thirds. Color two parts of the dough with red gel food coloring, and knead until it's uniform. Make a single dough ball with the red-colored parts, and knead to get a single piece.
- Stretch the dough using a floured rolling pin until you approximately get a half-inch thick layer. Make dough hearts using a cookie cutter and then build a tower by piling them up.
- Use egg wash to brush the hearts to stick to each other. The heart tower will measure 5 inches. If you get any extra red dough, make some cookies with it!
- Wrap the heart's tower in plastic wrap and stick it in the fridge for 1 hour. Ten minutes before taking the hearts out of the refrigerator, cut uncolored dough into thin strips. Aim for strips that are longer than the tower of hearts.
- Using the dough strips, fill the heart spaces to build a tube of dough. Cover the extremes so that the hearts remain hidden. Then, shape into a proper cylinder rolling the cylinder on a clean surface. Now, wrap the cookie tube in plastic and stick it in the fridge for 2 hours.
- Take the cookie tube out of the fridge and brush it with egg wash. Then, roll the cookie dough onto a bed of sprinkles. Fill the gaps using more egg wash and pour the sprinkles by hand, if necessary.
- Slice the cookies using a sharp knife, aiming for at least 1/2 inch thick cookies. Transfer the cookies to a baking tray lined with parchment paper.
- Put the cookies to bake in a preheated oven to 347 °F (175 °C). Then bake for 10 to 14 minutes and let them cool for a couple of minutes on the baking tray before transferring them to a cooling rack.
- Then serve and show your love!
Video
If you liked this Valentine’s Day Cookies Recipe, you might like some of my other recipes too.
And remember, if you try this recipe and want to share your pictures, tag me @lacooquette on Instagram. I’d love to share your photos on my IG stories.
Note: We originally published this blog post on February 13, 2017.




Leave a Reply